In 2014 I made a terrible Christmas mistake.
For gifts, I like to give people
nerdy homemade things, and I find that Christmas is a particularly convenient excuse to procrastinate on important tasks that I don't want to do (like study). For Christmas of 2014 I made
chocolate molds of cool extinct animals, including a giant ground sloth and a 2D
Dunkelosteus face. The molds were cute, the chocolates were tasty, the bacon-flavored lollipops I made in these molds were hilarious and kind of greasy, it was fun all around. Yet somehow this sparked a series of events that led to a replica of
Cophecetus bleeding unset resin like a mysterious holy relic, hives from my fingers to my biceps, and a floor so splattered in epoxy we may need to pour more plastic on it just to even the whole place out.
 |
| Same same, and yet SO DIFFERENT. |
It started like this: In Fall 2014 I was working as the Museum Collections Graduate Teaching Fellow, and my advisor decided I should cast and mold some specimens.
"You like Arts and Crafts," my advisor said.
"You've done some molding before," my advisor said, referring to the aforementioned chocolates.
"I'll even show you how to do it!" my advisor said.
Turns out that when Edward said "make a couple of molds" he meant "why don't you mold some whale skulls???"
 |
| I THINK YOU UNDERSOLD THE SCOPE OF THIS PROJECT EDWARD |
When people want to put fossils on display, it's often a lot better to put a cast (or replica) on display instead - they're lighter and less valuable than the original thing so breaking them is both less likely and less traumatizing. This is especially important when the specimen is, say, a whale skull - that's a lot of rock to hang on the wall otherwise. Making good-quality casts is difficult, time-consuming and very expensive... making good-quality casts of large and unusually shaped objects like whales is EVEN WORSE.
Here's how a good cast should be made, with a Desmostylid tooth as an example:
Instead of this clear cut diagram, I experienced an ongoing series of disasters, the sort that happen when you let a tenacious graduate student tackle a project several orders of magnitude larger than any of their previous experience. I had several wonderful undergrads helping me, a fantastic volunteer from Southern Oregon Community College, and occasionally even my advisor. Trouble was, NONE of us had cast anything so large before, and we had completely underestimated the difficulty in doing so.
The primary trouble of casting large specimens is that once you start working with specimens which are bigger than a basketball, your materials stop being quite so obedient. In some cases, our walls would collapse under the pressure of the molding compound, so we'd use random objects to prop them up.
 |
| As an example, here is a dolphin skull being propped up by duct tape, plywood, a rock hammer and a bottle of resin |
The compounds we used to make these molds and casts are REALLY expensive, so we wanted to conserve materials wherever possible. This led to extensive creativity. For example, we used cardboard walls to build up molding compound onto high peaks while not pouring it into the general mold. We used plastic cups and cardboard to fill in the mold, as they're much cheaper than silicone.
This led to some monstrous looking packrat castles, like the whale skull mold below:
 |
| This looks like a kindergartener's experiment. A Playdoh Frankenstein should emerge any second |
Silicone rubber is floppy and will lose its rigidity once taken off the object, so you create a hard "Mother Mold" of plaster to help support it. This was also problematic. We went through several bouts of buying the wrong plaster at various construction materials stores, and even when we did get the right plaster it didn't always hold up. We tried suspending heat lamps from the ceiling in order to speed up the setting process, which really demonstrated that my advisor has no sense of personal safety whatsoever, but that didn't help either.
 |
| "Let's suspend the heatlamp from a flammable rope and leave it on overnight." |
Eventually I started incorporating structural support in the mother molds (aka I tossed in random objects to act as backbones) but even these didn't work out great for anything other than the hockey stick-shaped dolphin skull below. As a side note, we are now out of plastic cutlery in the lab.
 |
| The Forks Died for a Good Cause |
Because of the plaster shenanigans, we were itching for a new solution. When we moved onto the 7-foot-long mammoth tusk (YES A WONDERFUL PROJECT FOR A BEGINNER), my advisor and I made a different plan for the mother molds. Instead of using plaster that would break all the time, why not use super toxic epoxy instead?
 |
| Safe Science is Fun Science |
Honestly I think he just wanted an excuse to get a respirator and make Bane references for a couple of months without getting called on it. Unfortunately, fiberglass is a very versatile material that is somewhat flexible. My two mold halves, lovely as they were -
 |
| and they WERE lovely |
ended up flexing so much while being filled that they didn't fit together. At all. We ended up having to send off half a tusk.
 |
| It was sad. |
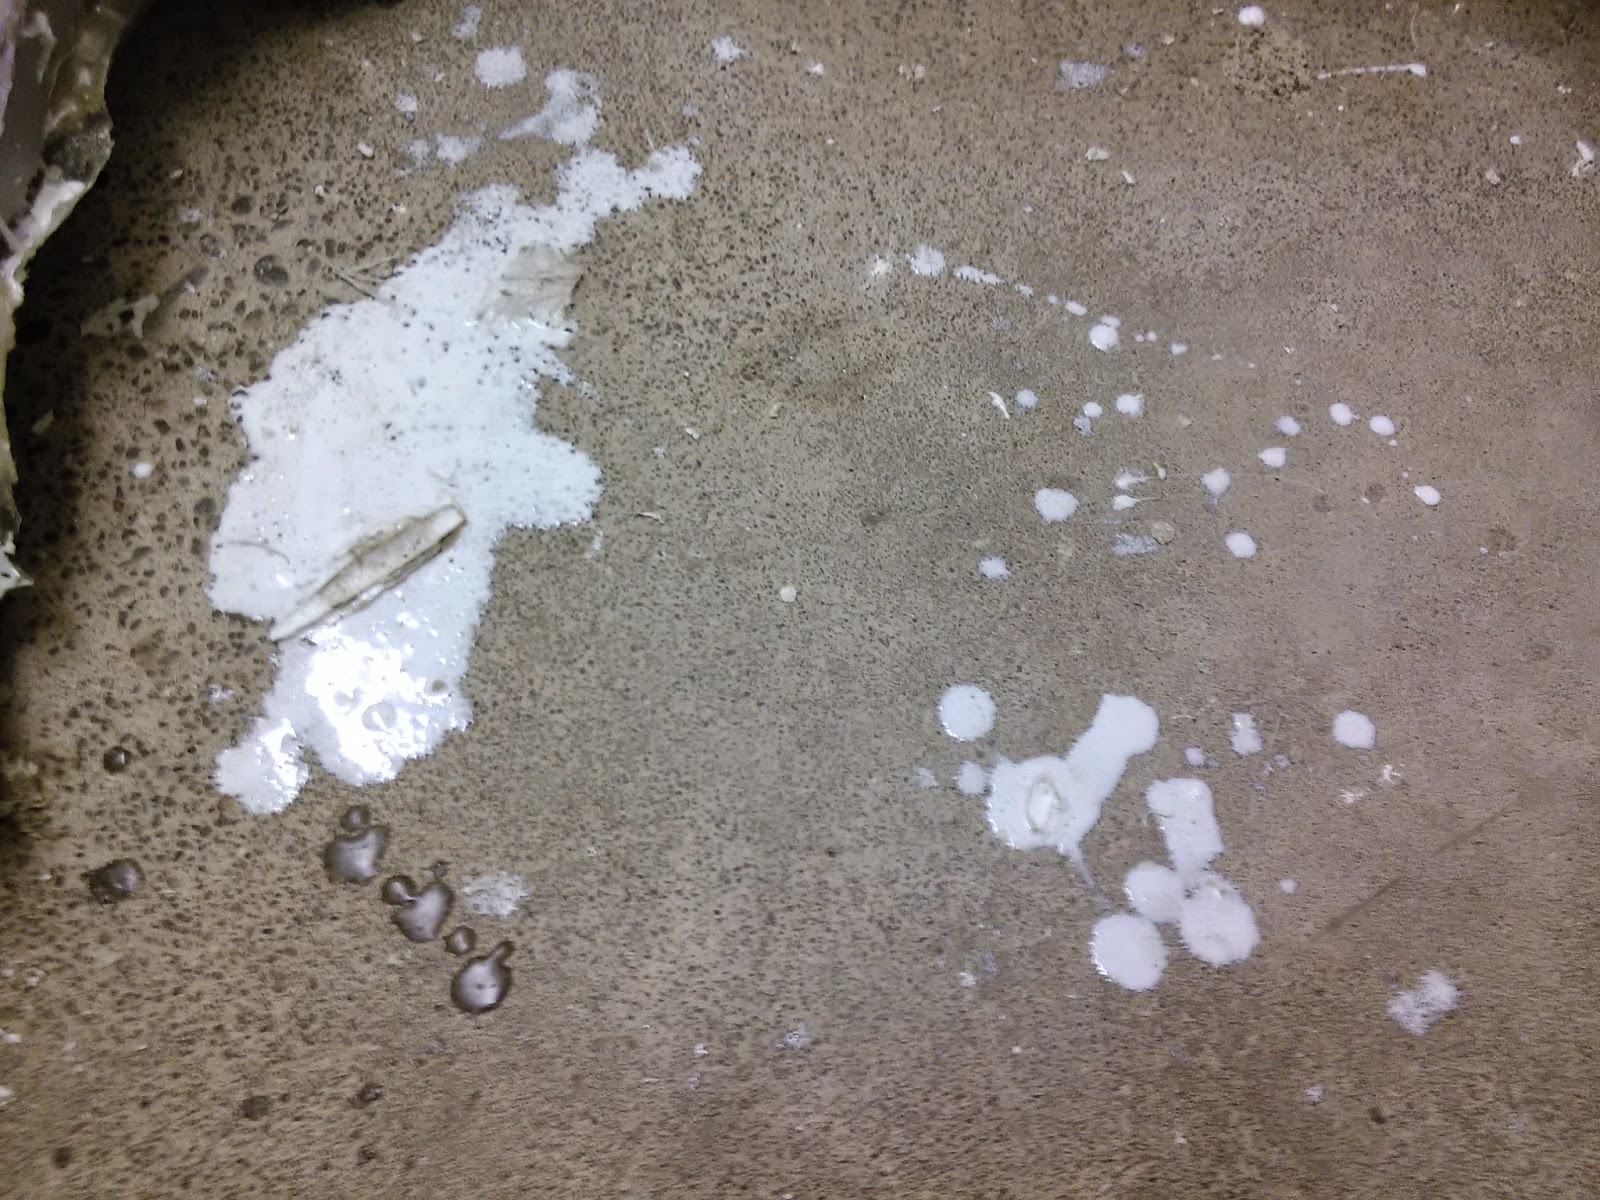
But that was far from the worst part. The molding was pretty easy. Sure, we had dozens of silicone leaks and spills but at least the silicone doesn't make me rashier than a toddler in a field full of flowering peanut plants. Mother molds were similarly low maintenance, when put into perspective. Boat epoxy and fiberglass are actually not all that difficult to deal with, though the strength left something to be desired (next time we'll used Hydrocal plaster). The real difficulties came in during the casting process, where you fill your floppy purple mold with toxic and hot chemicals that either don't set at all, or set way too fast for you to deal with. Because you only have 5 minutes of cure time, there's a lot of panicking that goes into working with this resin. This panic led to white drips on every surface, which is why the floor of the lab looks like the set for Toy Story 7: Orgy Time.
 |
| OH GOD WHAT HAPPENED HERE |
Let's start with Problem Child #1:
Cophecetus. This is the skull of a whale from the Oregon Coast. It's a holotype and it's an old one, which means the whole damn thing was embedded in plaster. "I don't want to waste valuable molding compound on plaster," I thought. "Why don't I just do a surface mold?"
Oh, I don't know Meaghan-of-the-Past, maybe because liquid plastic rolls off of flat surfaces if you don't have walls, and clay walls don't stick to silicone molding compound?
 |
| I may be smiling, but inside I hate my previous attempts at Good Ideas |
I did manage to get some of the plastic to set up on the skull by waiting for it to ALMOST harden then pouring it rapidly so it wouldn't have time to roll off the side of the specimen. Once the compound had hardened, I could build up clay walls, as clay will stick to plastic just fine. This led to problem number two: the casting compound occasionally refused to set.
I'm still not sure why, but any time we added color there was a part of the compound that stayed liquid. At first I thought "OH IT WILL JUST SET IF I POUR MORE ON TOP OF IT," which was a good working theory that didn't actually work. Then I thought "I WILL TRAP IT IN WITH PAINT!"
 |
| Here resin is proving it can break through paint. |
This also proved not to be true. In the end, I left
Cophecetus draining like a large pustule in the lab for about two months before finally figuring out that if I doused the whole damn thing in Acryloid and painted on top of that it mostly didn't seep out any more.
And yet, my casting woes were not yet finished, for there was still a 7 foot mammoth tusk. Remember how I earlier said the pieces didn't match up? Well, that wasn't the only problem. I decided that even though I was making two halves of a tusk, it made sense for us to cover about 6 inches of the tip with silicone all the way around so that the tip would be nicely formed. This was an okay idea, except that because of the flexibility of the fiberglass and the weird twisting angle of the tusk there was no way to orient the tusk so I could easily fill the tip. So I decided I'd just have to put on gloves and splash it around to make the resin stick to the top.
 |
| I'm sure gloves provide adequate protection in all cases, right?? |
Oddly enough, splashing madly about in hot setting plastic isn't the best plan I've ever had! Yes, the tusk did have plastic on all sides of the tip and it was hollow: the goal of a complete tip with minimal material was accomplished. Of course, my arms ALSO had a nice veneer of plastic on them... which is a very strong skin irritant, resulting in an even layer of hives on my arms for a month. Initially I was really confused as to how it had gotten all the way up onto my bicep (I had been wearing a lab coat and also I wasn't actively bathing in the stuff, just aggressively swirling) and then I went into the lab and put that coat on and found my entire right sleeve was crunchy. Turns out that stuff really soaks through lab coats just fine. Mystery solved.
 |
| The mystery of how I became water-resistant was simultaneously solved. |
Despite the rashes, dearth of plastic cutlery and excessively creative space-saving techniques, we did produce some really nice looking replicas. I just got word from the Oregon Institute of Marine Biology (who contracted this series of disasters, except for the tusk) that they love their replicas and since none of them mentioned suspicious oozing I am optimistic that my acryloid trick finally stopped the seepage.
 |
| The back of the skull of Cophecetus |
 |
| The leaky rostrum of Cophecetus |
 |
| Which one is the real dolphin? |
All in all, OIMB got some cool replica fossils for their new marine mammals exhibit, our lab got an exciting dripped-plastic makeover, I got over my allergic reaction and we all learned a lot, including that my advisor doesn't have a healthy fear of heat lamps that he would if he'd ever lit a fire with one like I have. In the end I suppose we'll have to chalk this one up as a win.


No comments:
Post a Comment